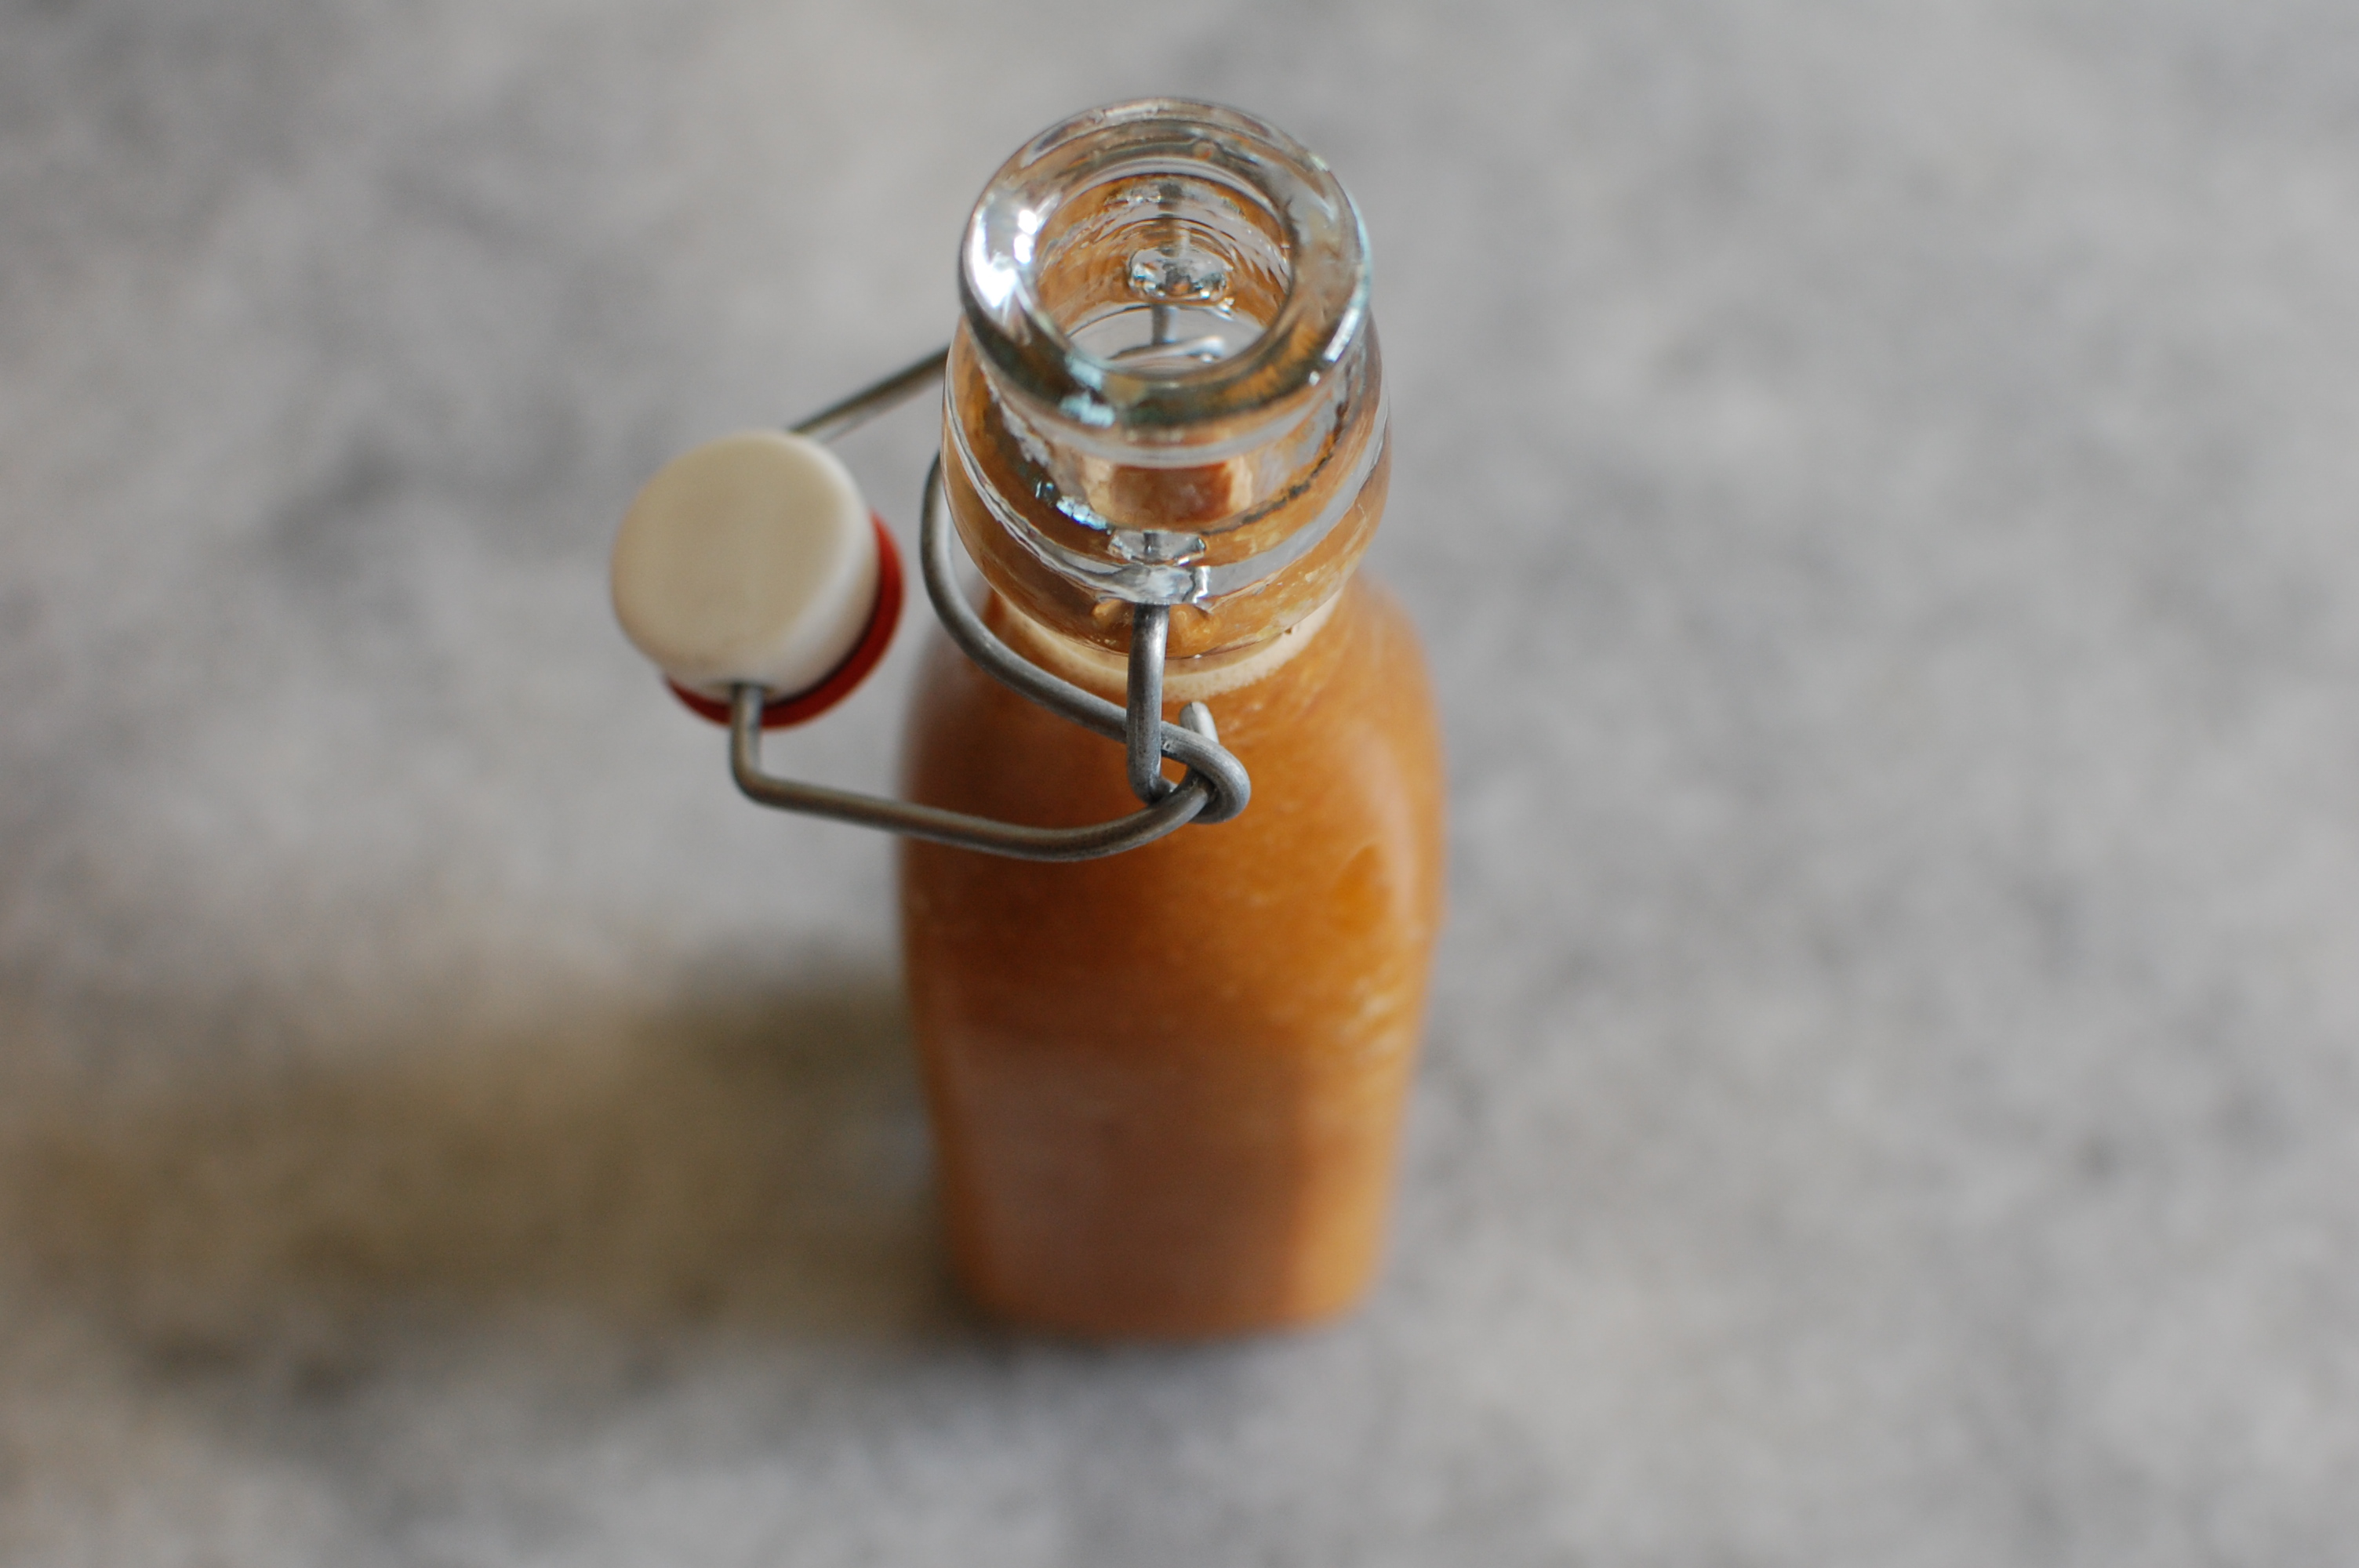
Last weekend, I got to teach a preservation workshop with Margaret Roach. I loved it–the group was wonderful, we were surrounded by ripe tomatoes, and it all happened against the backdrop of Margaret’s garden, which is a truly inspiring place. It was such a success that we decided to make it the first in a series, and I’ll tell you more about that soon as we firm up the details.
Although our main preservation techniques for the day were canning, freezing, and dehydrating, I let it slip that my favorite current method of preserving happens in a crock, and that at that very moment I had 4 or 5 crocks going in my kitchen, each with a different ferment inside.
“And why fermentation over canning?” someone asked.
The truth is, one isn’t a replacement for the other. Of course, I ferment different ingredients than I would cook and water bath can, although there’s a bit of overlap. But I was able to find the words for what I’ve been loving about the crock over the canning pot lately, that is, when I’m canning, I’m trying to combat and kill bacteria in order to make the food inert and safe, and when I’m fermenting, I’m trying to bring more bacteria and activity into the food to transform it into something even better and more alive than the ingredient I started with. In some ways, it feels like I’m working with nature rather than against it.
When I’m talking to people about how to get started with fermentation, I find it’s easy to get stuck in the practical details. What do I use as a crock? How do I set it up? What am I looking for? How do I know it’s ready? What’s that stuff growing on the surface of the brine?
I thought I would go through some of these questions today. I know that many of you are fermenting in your kitchens, and I’d be grateful if you’d pipe in in the comments to share your systems and experiences too, and if any one has questions, that’s a great place to ask them. Fermentation is very customizable to your own kitchen and the materials you have, and everyone seems to have their own way of making it work for them. There are a few really wonderful books out there, too (Sandor Katz’s Wild Fermentation and The Art of Fermentation are at the top of my list). I’ll finish up with one of my favorite recipes for the crock lately: fermented hot sauce. This is different than the hot sauce in my book, as it requires no roasting or skinning of the peppers, and the flavor of the ferment really dominates (similar to Tobasco, which is also fermented). It’s a great moment to make it, as many farmers have big baskets of hot peppers for sale at the markets right now, and with one big chile purchase, you can make enough hot sauce for the year.
Fermentation is a wide topic, and we could talk about everything from yogurt to preserved lemons to beer. But I’m going to focus on a two specific categories: 1. Salt-brined pickles where we add a brine, and 2. Krauts and other ferments that create their own brine.
What do I use as a crock?
The first answer is… a crock. Ceramic crocks come in all sizes, and they’re easy to find online, in kitchen and hardware stores, and if your lucky, at tag sales. If you find a used crock, just make sure it’s in good shape with no chips or cracks. I have a 1-gallon crock that I love for smaller projects (it makes a 1/2-gallon jar of sauerkraut or kimchi perfectly), and I also have a 3-gallon crock I use for larger projects.
A jar also works fine as a crock, but the key is to make sure it has a wide enough opening so you can rig up a system to weight down the contents (more on that in a moment). I like to use flour jars like this when all the crocks are full.
How do I set it up, and what’s the basic process?
For brined pickles like cucumber pickles and dilly beans: I pack the crock (any quantity up to about 3/4 full) with clean cucumbers (cut off any blossom or stem), green beans, or any other pickle-able vegetable, as well as fresh herbs, fresh or dried chiles, garlic, ginger, peppercorns–really anything to add flavor. You can also add grape or horseradish leaf to help maintain the crunch, although that’s not necessary if you don’t have one. Then mix enough brine to cover the vegetables, using 3 tablespoons of sea or kosher salt per 1 quart of water. Pour the brine over the vegetables.
For vegetables that easily create their own brine (like sauerkraut and kimchi): Shred the veggies or chop finely. Combine them with salt in a large bowl (the ratio is usually about 1 1/2 tablespoons salt per 3 pounds vegetables). Massage the veggies, and beat them up with your hands, a rolling pin, or a large wooden spoon, doing your best to break down the vegetables to help them release their liquid. Pour the veggies and their liquid into the crock. If the liquid doesn’t cover the veggies (and chances are, it won’t), don’t worry. Weight down the veggies (see the next step), and check back the next day. If the liquid still doesn’t cover the vegetables, prepare a brine of 1 teaspoon of salt to 1 cup of water, making enough to cover your veggies.
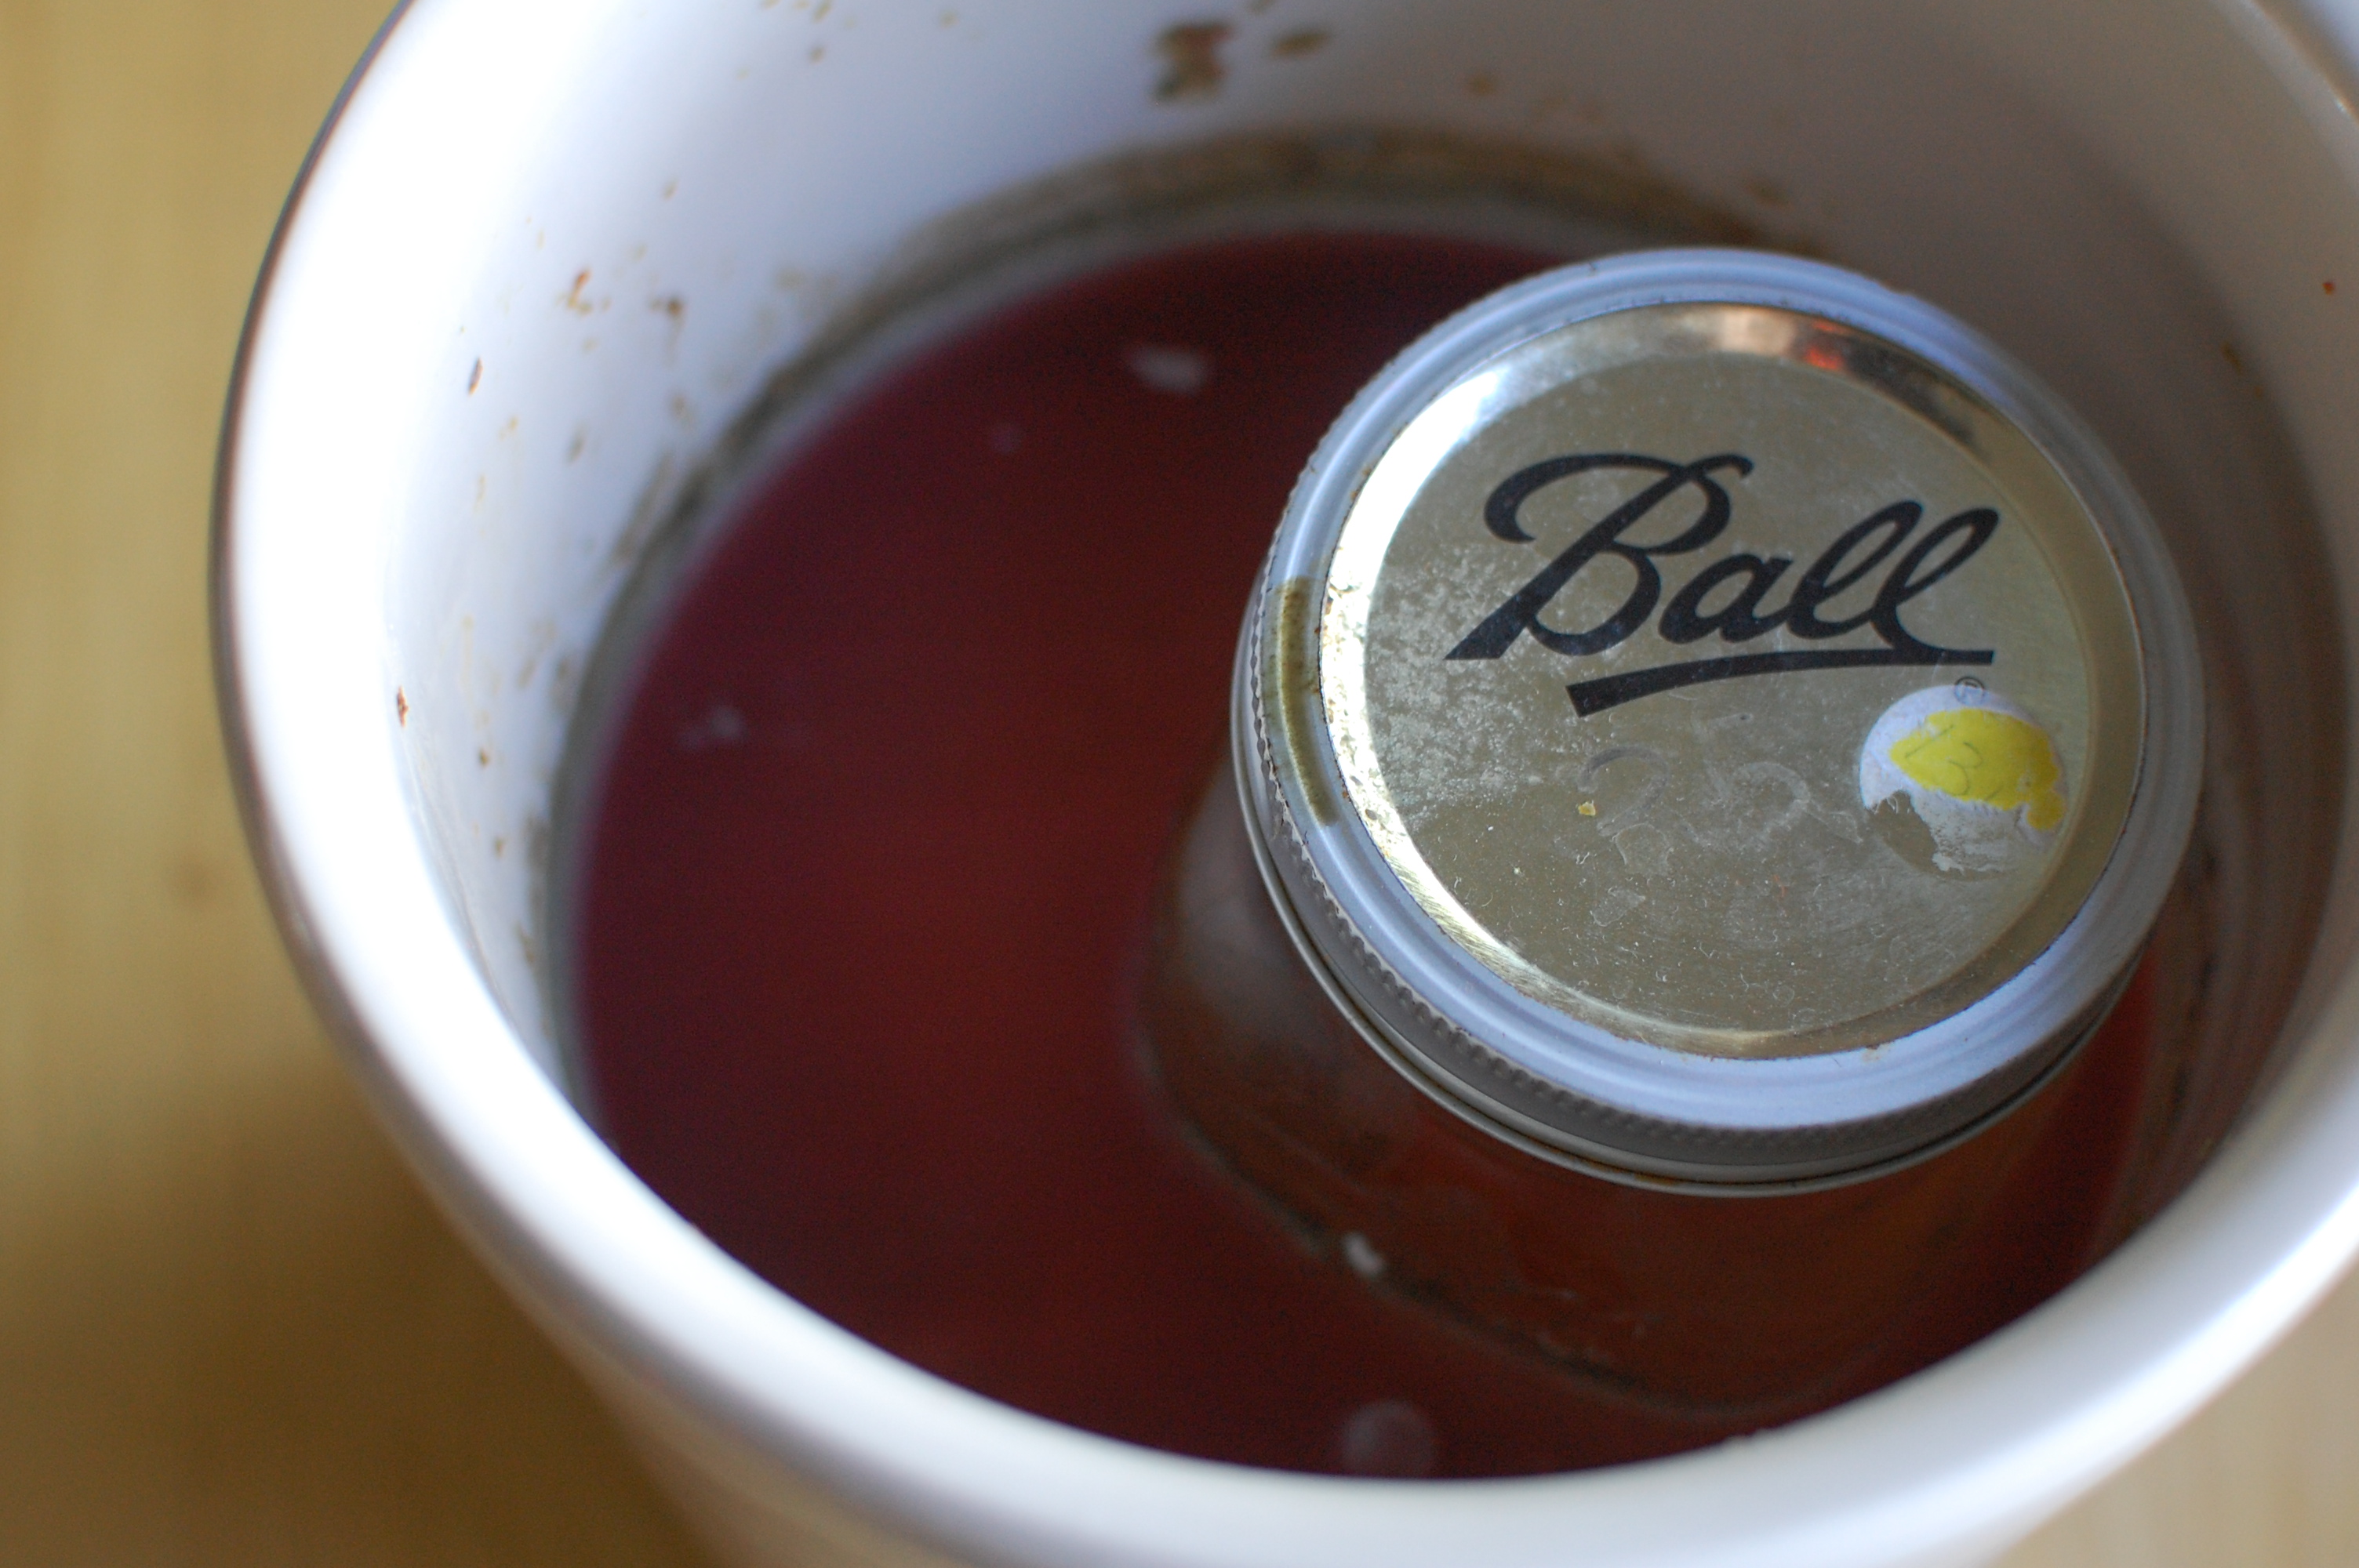
In either case, you have to weigh down the vegetables: Use a small plate the fits inside the mouth of the crock or jar. Make sure it’s scrubbed clean with soap and hot water. Place the plate over the vegetables. Now, fill a clean jar with water, screw on the lid, and put the jar on the plate to act as a weight. The brine will come up over the plate, and the veggies should be below the plate. Don’t worry if there are are a few bits of veggies floating in the brine. It will look like this (there’s a small dessert plate under that jar weighing the veggies down):
Now cover the crock with a dishtowel or cheesecloth. This will keep out the dust and flies. Some people ferment in airtight buckets, but I’ve had much more luck with a system that lets the air in.

From here, you want to just let the process do it’s work. Check the crock every few days, and do two things:
1. Skim anything that’s growing off the surface of the brine. Many ferments will have some sort of growth, but most often it will be a fine white “bloom” (as Sandor Katz calls it) on the surface. It looks something like this: 
You’ll often see little bubbles–that’s good too. What you don’t want (and some might disagree with me on this- so definitely pipe in!) is large amounts of fuzzy green, blue, or black mold. If you’re having a lot of mold, odds are that there’s some unhelpful bacteria that was on the surface of your crock or plate, or in the vegetable itself.
But this white stuff, as well as little bits of mold growth, are totally part of the process. Just skim them off.
2. You also want to taste the product every few days. In hot weather, your pickles or kraut might be ready in as little as 5 or 6 days, so you want to monitor how it’s going.
How do I know it’s ready?
For brined pickles, you know they’re ready when they taste good and pickled, but still have a good crunch. If you’re pickling cucumbers, you can cut into a cucumber and see if it’s fermented all the way through. If it’s a uniform color and texture all the way through, it’s done. If it’s still raw in the center, it needs more time.
For krauts, you know they’re ready when they taste good to you. I like a kraut with some crunch to it, but some people like them softer and even more fermented.
Most ferments take between 5 days and 2 weeks in my kitchen.
What do I do when it’s ready?
Transfer the contents of the crock to a jar, pour the brine overtop, and refrigerate. The jar should be good in the fridge for 6 months to a year, depending on the product.
What about the smell? Doesn’t this stink up your house?
Totally. But if the process is going well, the smell is usually pretty good. If it’s too cabbage-y or garlicky for you, you’ll want to find a place to put your crock that’s more out of the way. If the product starts to smell bad, like rotten vegetables, your ferment has gone bad and you should dump it in the compost. You’ll know it if this happens–it smells terrible. It’s only happened to me once, and it was during a 100-degree week in August.
What’s the best place in the house to ferment?
This is really up to your preference. Ideally you want a cool, dry spot where no one will trip over the crock. That being said, I like to ferment right in my kitchen (often on the counter if I’m using the small crock) so I can remember to keep an eye on it.
How do I know it’s gone bad?
Although I’ve covered this above, I want to be really clear about this, as it can be intimidating to judge it when you’re not quite sure what you’re looking for.
1. It’s gone bad when it smells rotten and terrible.
2. It’s gone bad when you have a crazy overgrowth of mold.
3. It’s gone bad when the product tastes terrible to you (and you tend to like these things).
4. It’s gone bad when it’s so soft that it’s dissolving in the brine (although it’s still edible, but it’s not yummy.)
What’s okay (and even good):
1. Bubbling.
2. Bloom and small bits of mold.
3. Slightly soft vegetables.
And that’s it! I’m so excited to talk more in the comments, and I’m hoping to learn more from all you fermenters out there, too.
And now, hot sauce.

First, a note on spice and quantity.
Of course this sauce varies with the spice of the pepper you start with. Some people love to use one pepper over another, and to have a lot of control over the spice. But I tend to make this recipe when I have access to a bunch of fresh hot peppers, and I take what I can get! I make this with a mix of hot peppers, and I’m never quite sure what I’ll end up with in terms of spice. This batch of sauce was made with a mix of jalapeños (this is why it’s not quite red), cherry bombs, and Hungarian hot wax peppers. It’s HOT, but just right for me. Cherry bombs and Hungarian hot wax peppers are fairly mellow, and they temper the jalapeños, which are really hot this year. And whatever peppers you use, use gloves to handle them.
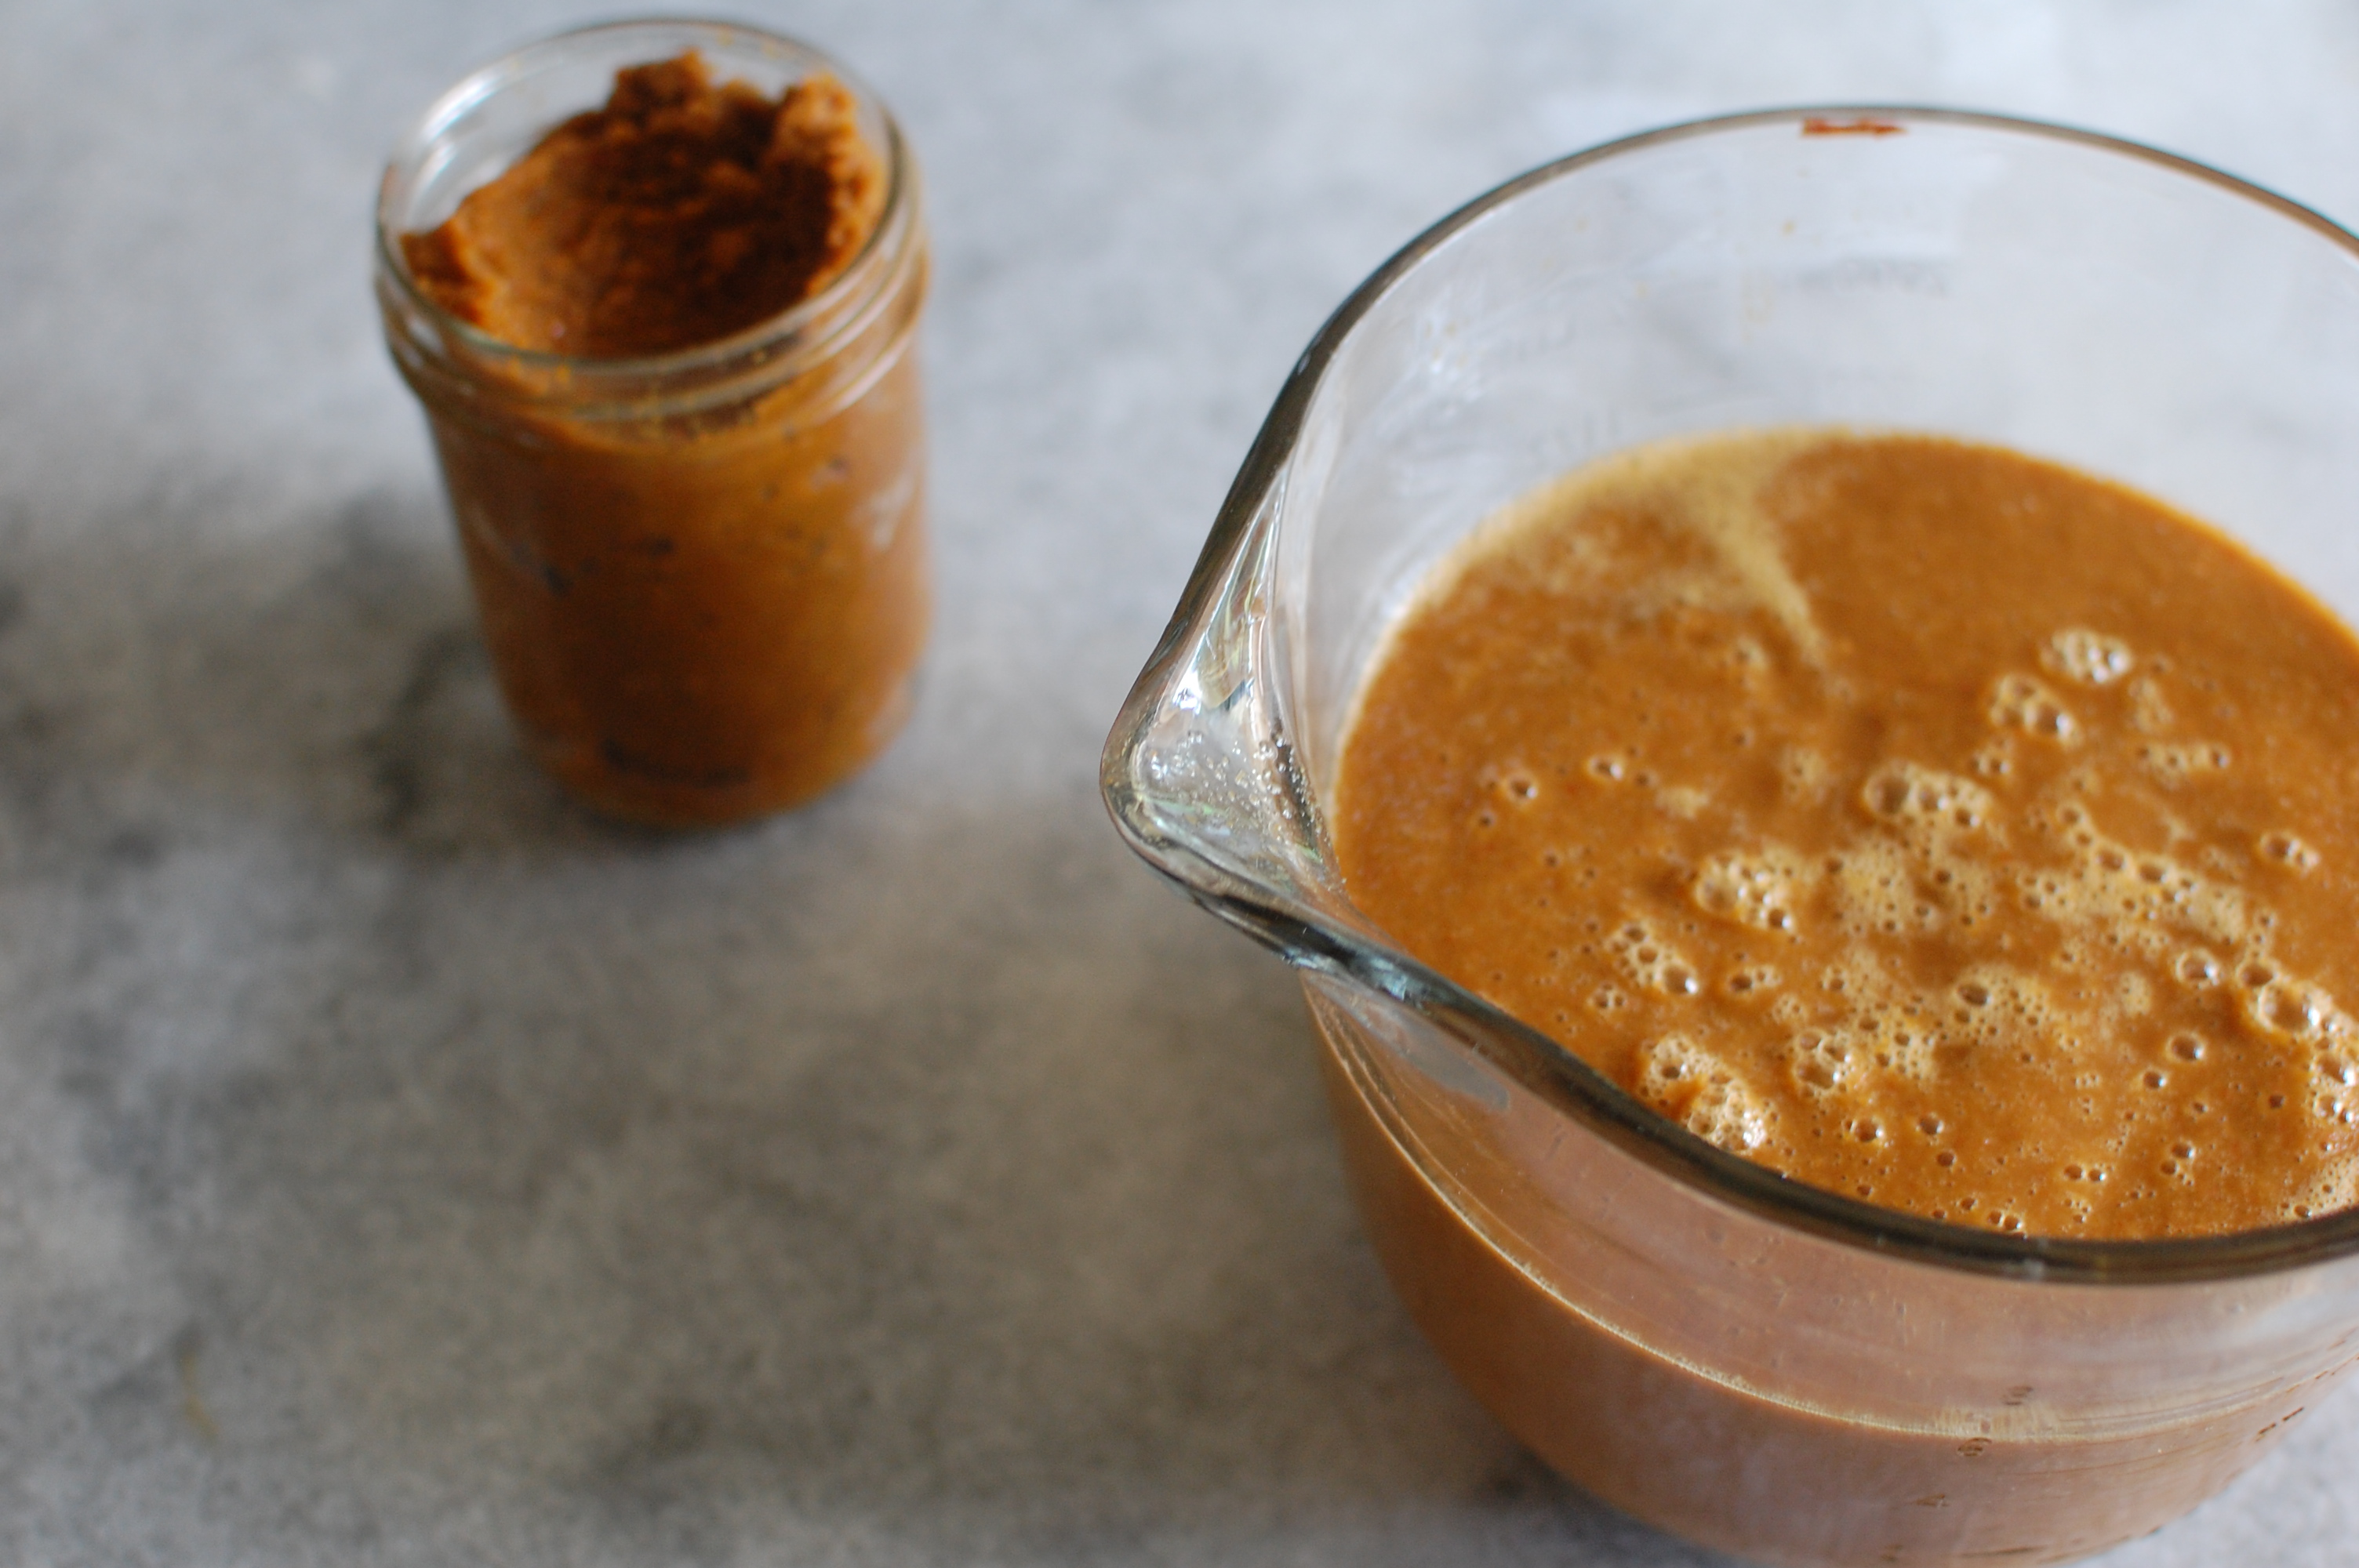
This recipe creates 2 products. You’ll get about 6 cups of hot sauce, which will keep well in the refrigerator for up to a year. You’ll also get about 2 cups of a dense chile puree, which is great in place of chile paste. This recipe follows the method for vegetables that create their own brine, but it involves a bit more salt than usual, and the fermentation is helped along by a little pickle juice or whey.
Lacto-fermented Hot Sauce
makes about 6 cups, as well as 2 cups fermented chile paste
3 1/2 pounds hot peppers (mixed or all one variety), snipped of their stems
2 medium carrots, sliced
1 head garlic, cloves peeled and roughly chopped
1/2 cup sea or kosher salt
1/2 cup brine from other lacto-fermented pickle or kraut, or whey (if you don’t have any pickle juice or whey ready to go, just drain some plain yogurt until you have 1/2 cup whey- that’s perfect)
1/2 cup fresh-squeezed lime juice
1/4 cup honey
1. Working either all at once or in batches, combine the peppers, carrots, and garlic in the bowl of a food processor fit with the chopping blade. Process until the mixture becomes a fairly uniform mash. Open the lid of the food processor (taking care, as the spiciness will migrate into the air), and transfer the mixture into a large, clean jar or crock. Stir in the salt, beating up the mash to help release the liquid. Add the pickles juice or whey, weigh down the mash with a plate, and weigh down the plate with a jar. Cover the crock with a dish towel or piece of cheesecloth.
2. Every few days, check the contents of the crock, skimming off any bloom that’s gathered on the surface of the brine. Taste the brine, just so you can pay attention to how it’s changing.
3. Especially in the case of this recipe, I find the smell of the mixture actually changes when it’s ready. It will smell strong and even a bit vinegary, but then after 10 days or so (but up to 2 weeks), the smell will mellow out and fade. If you don’t notice this, it’s okay too, just stop it at about 2 weeks.
4. Skim any bloom off the surface of the brine one last time. Working in batches (unless you have a really big blender), combine the vegetable mash, the brine, the lime juice, and the honey in the blender. (There’s no need to evenly distribute the lime and honey between the batches, as it will all get mixed together in a moment.) Be careful, as the air in your kitchen is going to get very spicy. Then pour the blended mixture through a fine-meshed strainer, stirring as you go to release more liquid from the mash, like this:
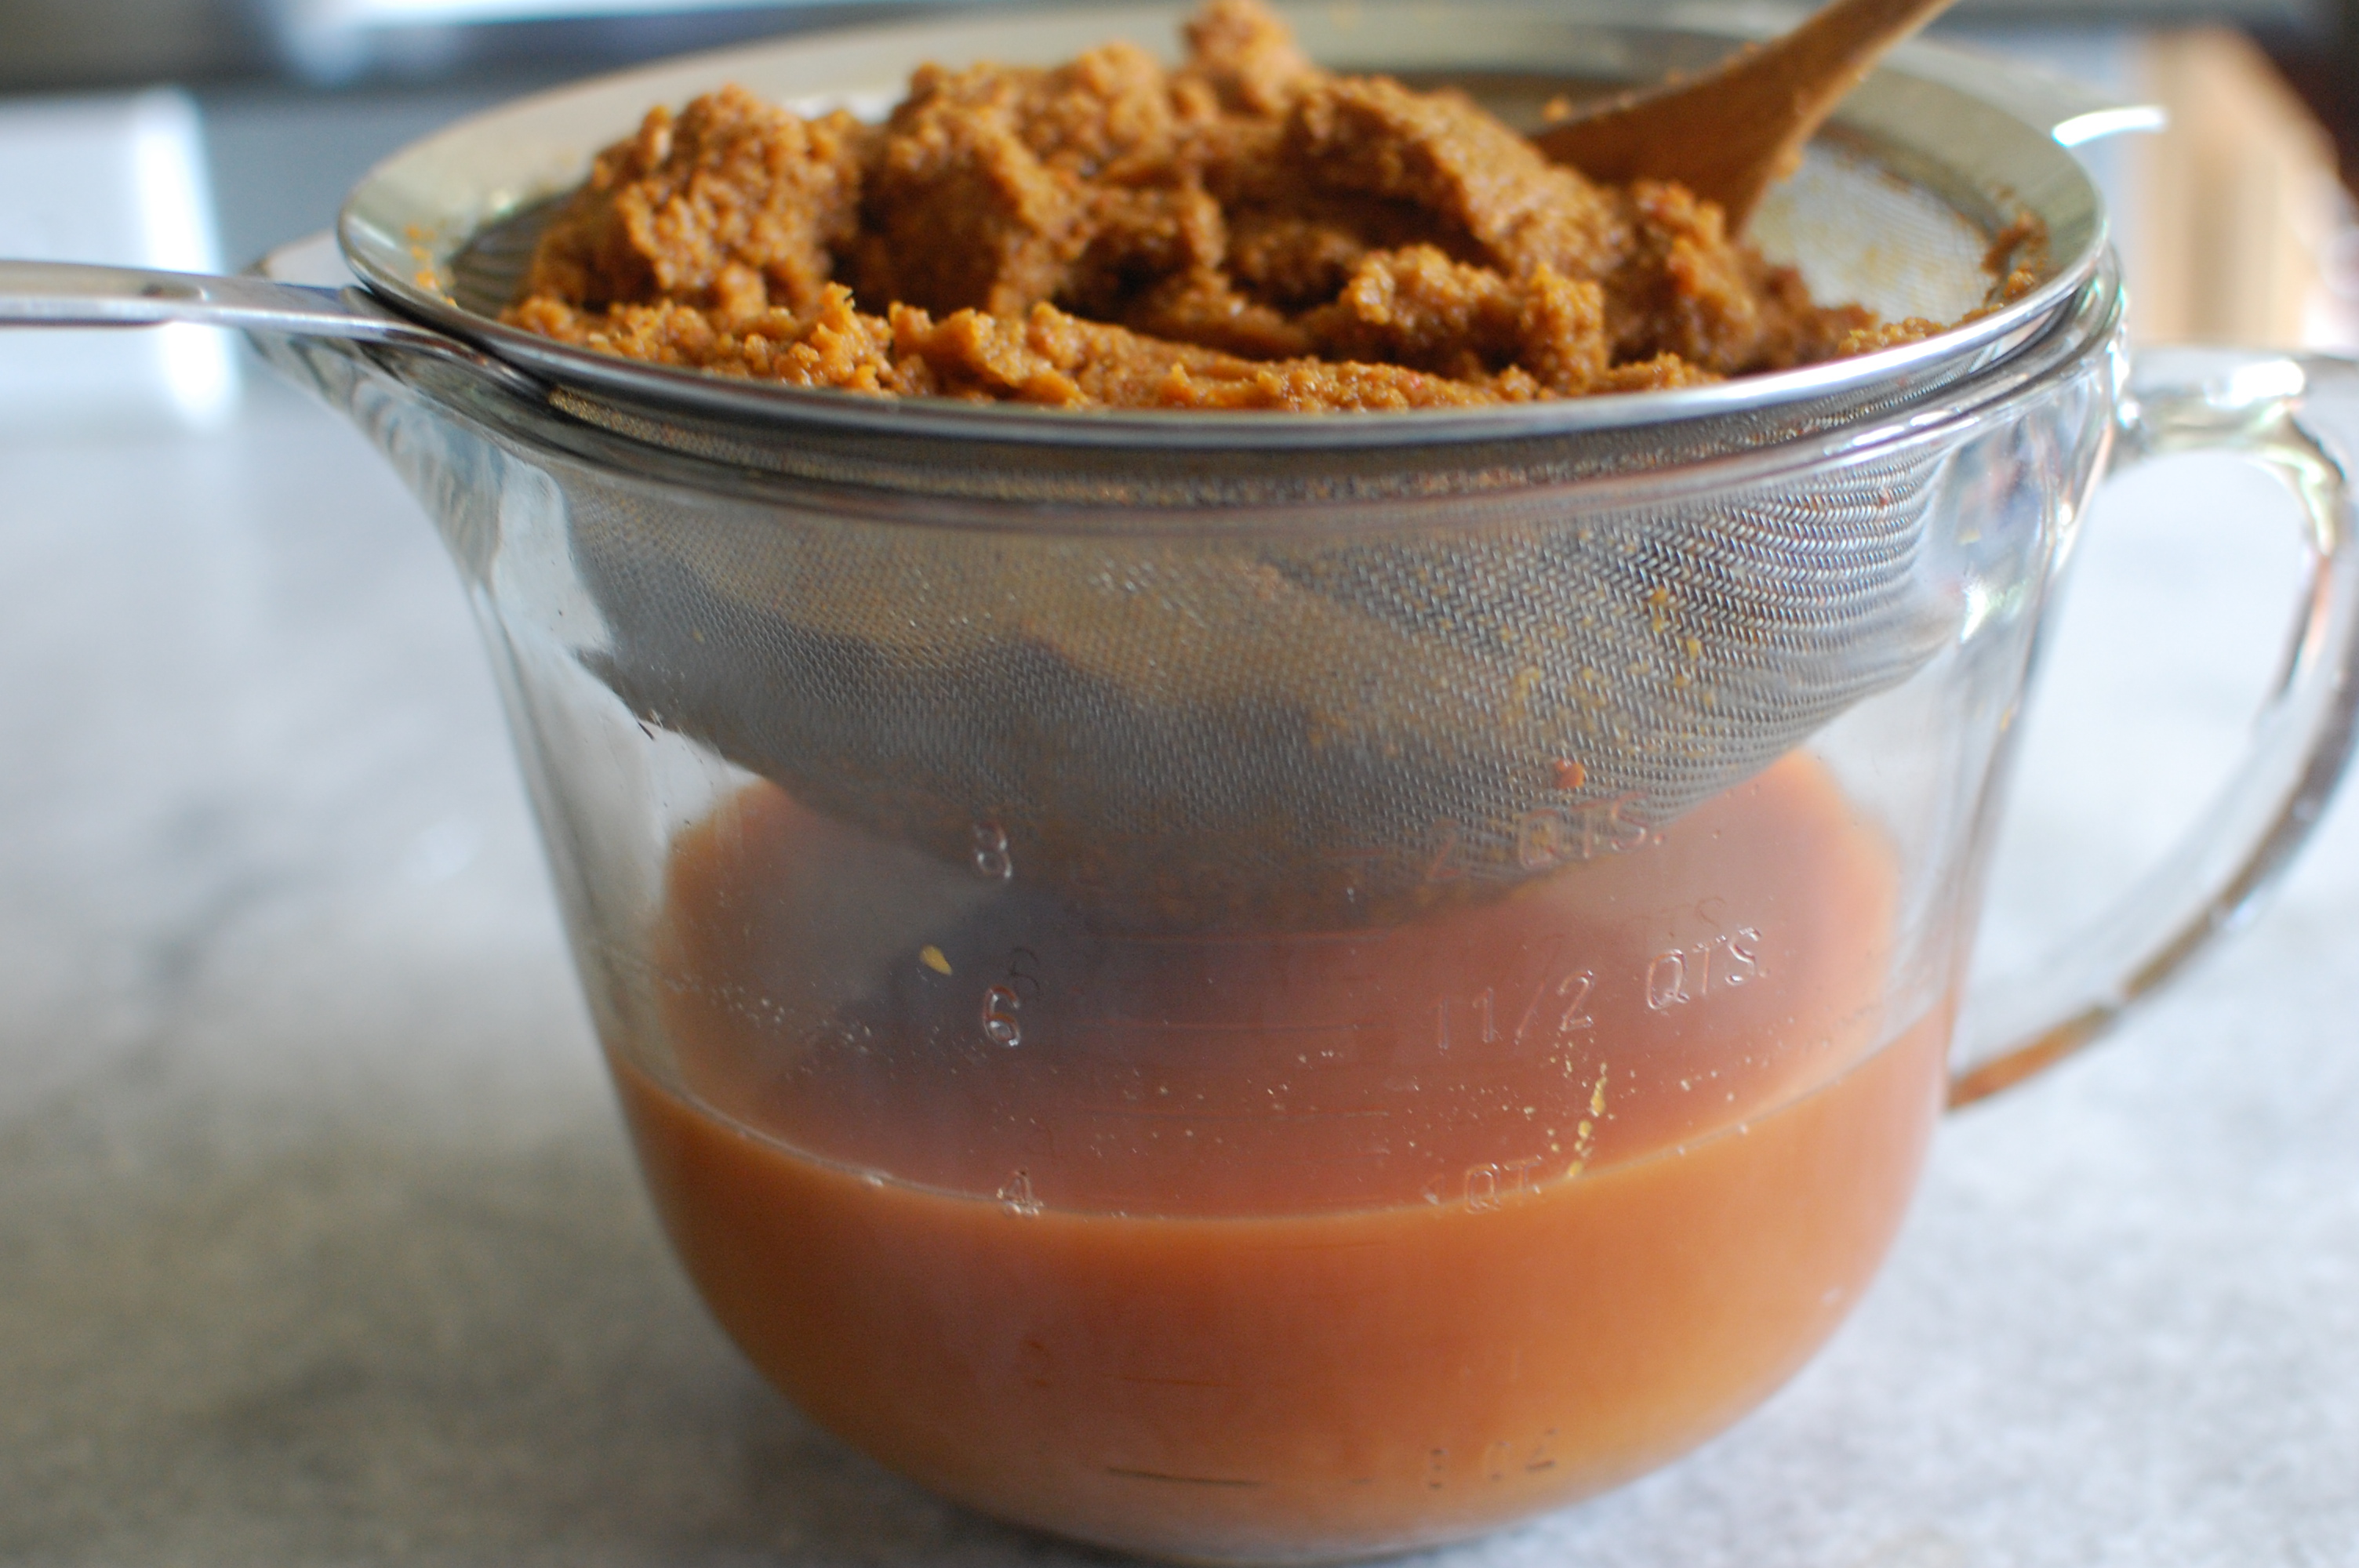
Now you have 2 products: a thin liquid and a thick mash. In order to create a good consistency for our hot sauce, we’re going to combine 1/2 the mash with all the liquid. So scoop out 1/2 the mash from the strainer, put it into a jar, and refrigerate it to use for chili paste. Then combine all the liquid with the remaining mash in the blender again. Blend until smooth, and transfer to bottles. Store in the refrigerator.
Thank you! This sounds very interesting!
We love hot sauce! Pinned!
Awesome! Have you tried making kombucha? I’d love to learn that, too.
I haven’t done much with kombucha, but I know it’s fairly simple! Any kombucha enthusiasts out there want to pipe up here?
I’m stockpiling this one for when my chilli bush explodes this summer.
As to kombucha, you will need to start with a scoby. I know you can buy them online but if you know someone else who makes kombucha then get a scoby off them. I love kombucha but have only just started playing with it. I am discovering there are so many different flavours you can make. I recommend looking at the two books Alana recommends. They are both a fantastic place to start. .
Is there a way to process this once it reaches the stage that you’re happy with? I remember my Granmy canning jars and jars of sauerkraut and pickles. And the idea of processing the hot sauce so that I could store it outside of the fridge or give it as gifts is very appealing. I can by water bath and pressure canner, so whatever might work best here.
Hi Chrystal,
Yup, like Rebecca says below, canning lacto-fermented products ends up killing a lot of the good stuff in there. But if you have good cool conditions in your basement or garage, it’s often possible to do long term storage that way.
Hi Crystal,
My family always canned our sauerkraut after it was done fermenting. It makes a shelf-stable product that tastes like sauerkraut but the canning kills all the beneficial bacteria. I’ve been experimenting with keeping my pickles and ferments in a cool part of my basement rather than the fridge. Pretty good results so far. Last year’s hot sauce (vinegar based, not fermented) lasted a good 6 mos. in the basement before it got moldy on the top. I skimmed the mold and it was good until we finished the quart.
Excellent post. One small point. If a dill pickle is not fermented all the way through, we call it a half-sour. Jewish delis often sell them like that, or serve them with sandwiches.
Re kombucha, you can also start with a bottle of kombucha. A bottle of kefir won’t produce grains, but a bottle of kombucha in a gallon of sweet black tea will give you a scoby after a few weeks.
Hi Alana!
I bought a crock last Summer, but I wasn’t quite brave enough to try fermenting. Well this recipe had me digging out the crock! I couldn’t resist trying it with the abundance of peppers at our local farm stand right now. I’m on day 4. It smells so good! I don’t see any signs of bloom yet. Thank you for this inspiring recipe! Your book and blog have completely changed how I cook. I am hooked on homemade yogurt and love canning now!
Hello Nikki! Bloom may show up or it may not, but either way is okay. Just let it keep going and fermenting… And thank you for your kind words- I’m so happy to hear the book’s been getting such love in your kitchen 🙂
Hi Alana,
I did it! The hot sauce is amazing! It has been so popular at my house that I am thinking of making another batch before the peppers are gone. The only problem I have been having is that when I open a new bottle it explodes out of the top all over the kitchen! Yikes! I assume this means it is continuing to ferment. I’m not sure if this is good or bad or how to prevent this from happening. I used the same bottles I believe you show in the picture. Let me know your thoughts. Thanks!
Hooray! So glad it’s been such a hit. But the explosions! Are you refrigerating your bottles?
I have them stored in the refrigerator door. Maybe it will help if I move them to a colder spot in the fridge? Just used the chile paste tonight. Delicious also! Thanks again for this fantastic recipe!
Hey Alana,
Just wanted to pop by and say that I made this and despite my rather dismal failures fermenting chiles in the past, it worked! I did add a bit of cider vinegar to the brine, which seems to help me prevent the nasty kind of mold; I got a little bloom, as typical, but otherwise it bubbled away nicely.
One question: I don’t see many seeds in your end product chile paste. Is it just that your food processor is much better than mine? Or are you straining them out somehow? Enquiring minds….
Thanks for convincing me I should give fermented hot sauce another go!
Hello Kaela! So happy to hear about the success over there 🙂 So I just looked in my fridge and inspected my chile paste, and it is in fact a bit seedier than it appears in the photo (a little nice artsy blur?) although a lot of the seeds definitely were blended by the food processor. I’m just using a regular old cuisinart. I can’t imagine how I’d strain it even if I wanted to–maybe push it through a sieve? Sounds like a very spicy task…
I just roasted some peppers, tomatoes, onions and scallions can I make a fermented hot sauce with a scoby that I have from my kombucha brew?
Hi Kathleen, I’m not sure about this one. I’m not sure how a scoby would interact with all that. But I suppose it should be a starter, like any other ferment? I’m a little stumped here- but if anyone has thoughts on this- please chime in!
Hi Alana
a glut of carrots made me discover this: http://battleofthebanhmi.com/how-to-make-banh-mi/pickling/pickling-daikon-and-carrots/ (ordinary white radish will do just fine …)
Brilliant with lots of things, but of course especially brilliant with: http://battleofthebanhmi.com/how-to-make-banh-mi/banh-mi-make-your-own/ use any meat of your liking if you don’t eat pork
off to harvest the last beans – greets from Switzerland
r
Oh Regine, this looks great! I do have a ton of carrots, and I’m always up for a new pickle. Hello from across the ocean…
I have been making kimchi at home for a couple of years, and am now starting to branch out in my fermentation adventures. A brief comment about smells- I sometimes make kimchi using Korean radish, similar to daikon. I get a good ferment every time, but it always smells awful. I think some vegetables smell stronger than others. I haven’t tried it, but I suspect broccoli would smell pretty bad, too.
When I’m making kimchi, I often use plastic bags with a zipper-type seal, and then squeeze the air out before sealing it. This keeps the vegetables under the brine, and keeps air out. I also use large Mason jars fitted with airlock lids (I made my own, cheap!). It has been my understanding that oxygen is the enemy, and if you keep the oxen out, you will have little or no problem with mold blooms.
I am looking forward to lacto-pickling many of my garden vegetables this year. Cheers!
Just finished the hot sauce….I couldn’t resist and started it the week we were moving, much to my husband’s dismay. The end product is a bit too salty (used kosher salt) – any thoughts on how to salvage?
Oh I absolutely relate to the whole making hot sauce the day you’re gonna move thing. My husband never quite understand why I’m canning the night before a big trip. Now to fix your hot sauce… this definitely makes a salty pickly hot sauce. But if it’s too salty for you, I think the best way to dilute it would be with some whey drained off of yogurt. Just drain it through a cheesecloth lined strainer for a few hours in the fridge, and use that nice sweet/ sour liquid that comes through to dilute your sauce until it’s just perfect for you.
Great idea – I’ll give it a shot, thanks!
Worked like a charm – thanks!!
Good! I’m so glad to hear it!
I started fermenting hot sauce when I was in culinary school and I’ve never stopped. It’s one of my favorite things and a great gift. A great suggestion, if you don’t have a plate that fits correctly in your container, is to fill a gallon Ziploc bag with water and set that on top of the mixture. It will provide a good amount of weight and fill the shape of any container.